Step by Step Docker - Part 2
Dockerfile Essentials: Building Custom Images for Data Engineering


Previously, I had made a post on the basics of docker, explaining the basic functions and ways of running various images on your own computer. However, we also ran into the issue of customising the images to our specific need. Running the base image and manually every library at each run is laborious runs contrary to Docker’s promise of consistency and portability. Here is where Dockerfile comes into play.
Dockerfile - Container Image Blueprint
A Dockerfile is a text file containing instructions to build a Docker image. It specifies:
Base image (starting point)
Dependencies to install
Files to copy into the image
Commands to run during build
Configuration (ports, environment variables, entry point)
Each instruction creates a layer in the final image. The file executes these instructions sequentially to create a reproducible container image that can run consistently across different environments.
Lets take the SuperMario image that we used in the part 1 of the post. Click on ‘Tags’ → ‘Digest’ and you will see the image layers(i.e step by step sequential commands to be executed)
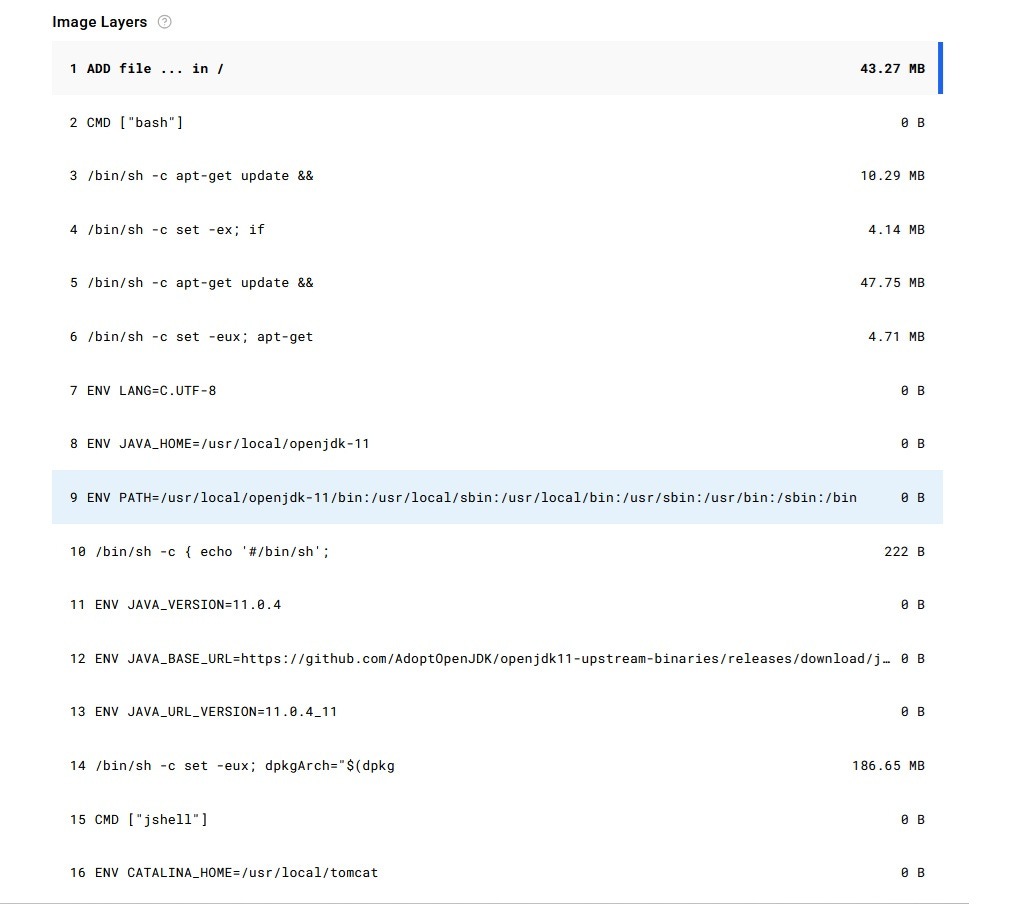
This is just the partial image layers, there are still many more layers that needs to be executed so that we can play Super Mario on the browser.
This demonstrates the customisation possibilities of a docker file, in some cases automation of processed by execution of the Dockerfile itself, which is pretty fascinating!!
Let’s build a Pokemon image
Lets build a simple python file using the Pokemon API. This file will download all the available pokemons and their respective url’s and save them to a CSV file.
import requests
import pandas as pd

pokemon_url = ‘https://pokeapi.co/api/v2/pokemon’
pokemon_params = {
    ‘limit’:-1
}

pokemon_json = requests.get(url=pokemon_url,params=pokemon_params).json()

pokemon_df = pd.json_normalize(pokemon_json[’results’])

pokemon_df.to_csv(’pokemon_data.csv’)
Make sure to have the requirements.txt available.
certifi==2025.10.5
charset-normalizer==3.4.4
idna==3.11
numpy==2.3.4
pandas==2.3.3
python-dateutil==2.9.0.post0
pytz==2025.2
requests==2.32.5
six==1.17.0
tzdata==2025.2
urllib3==2.5.0
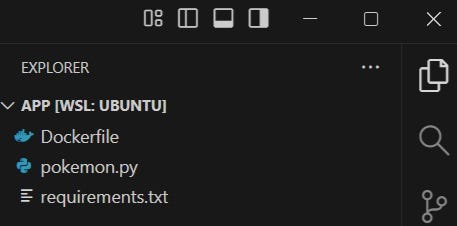
Our directory should look like the below, simple for this purpose.
Now lets build the Dockerfile
FROM python:3.13-slimThis line sets up the python version that we will use to execute the file. There are multiple images available and you can refer them in the official Docker hub for python images.
WORKDIR /appThis line executes the following processes:
Creates the directory if it doesn’t exist
Changes to that directory for all subsequent instructions
Sets the working directory for when the container run
This is important to keep in mind while executing the rest of the layers in this file. The default assumption after this line is ‘We are currently in the ./app folder’.
COPY . .This might seem confusing to a lot of people(I was stumped myself!) but lets make this easy. ‘.’ simply means ‘this folder’. The syntax here is ‘COPY <source folder path> <destination folder path> i.e copy everything from the current folder in the system where the Dockerfile is present to the current folder set in the Dockerfile.
RUN pip install -r requirements.txtThis will install the required libraries for executing the python file, make sure to have requirements.txt in your directory before running this command.
CMD [”python”, “pokemon.py”]This finally executes the file.
You might be wondering, what is the difference between ‘RUN’ and ‘CMD’ here, when we don’t have separate commands for running the same instructions in the command line.
In context of Docker, RUN command is usually used for installing software, creating files, setting up the environment. This happens while building the image as this creates a new layer, while CMD runs after the image is built and creates no new layers. You can have multiple RUN commands but only one CMD command(if there are multiple CMD commands in the Dockerfile, only the last one will be executed).
Building the image and running the file.
First, we will need to build the image. Run the below to build the image:
docker build -t my-pokemon-app .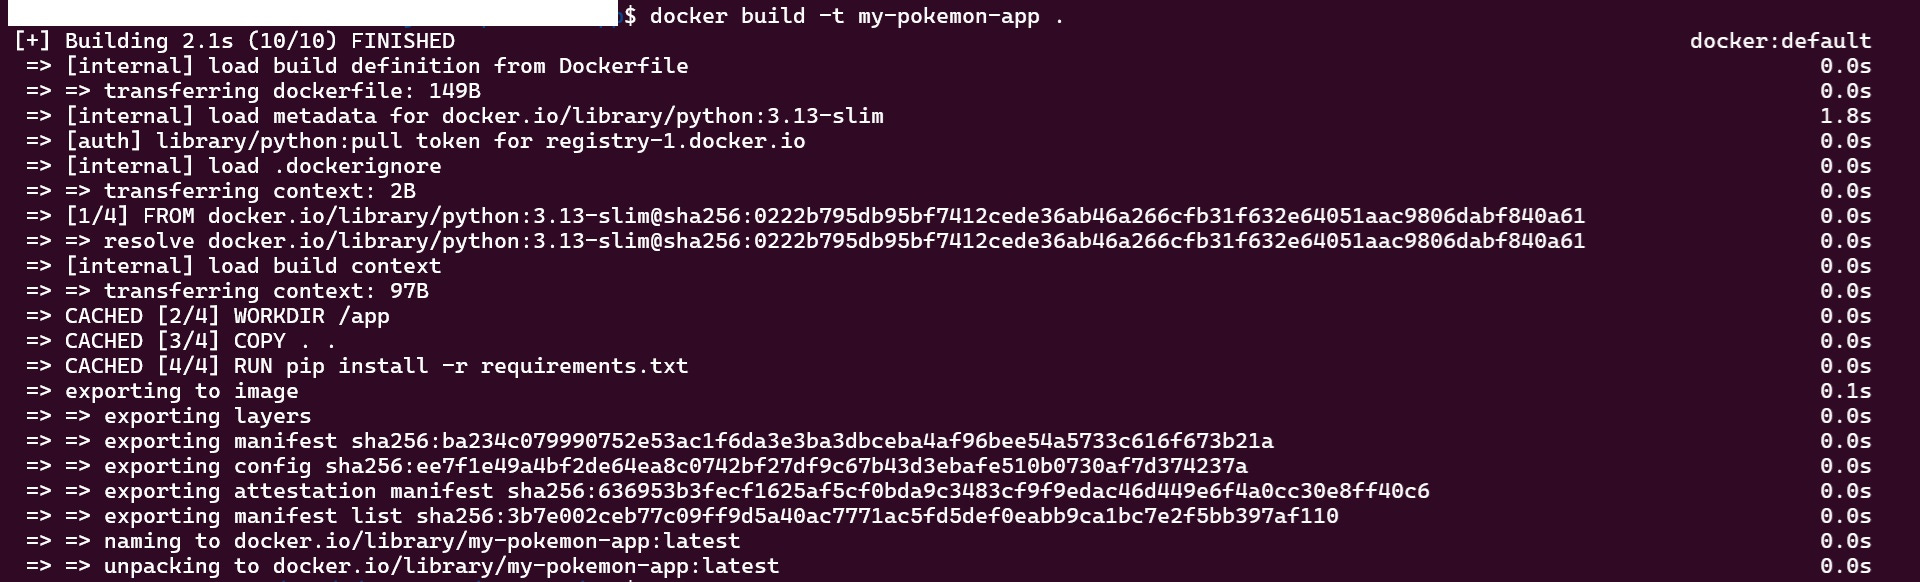
As you can see in the image, the image is ‘built’ here but python file is yet to be executed. Now that this image has been built, lets run the image to get our results.
docker run --rm --name my-running-app -v .:/app my-pokemon-appNote:- We need to add volume(-v .:/app)so that the CSV file persists locally, or else the data would only exist inside the container and disappear when it stops. The volume maps your local directory to the container’s /app folder, so the CSV file is saved to your host machine.
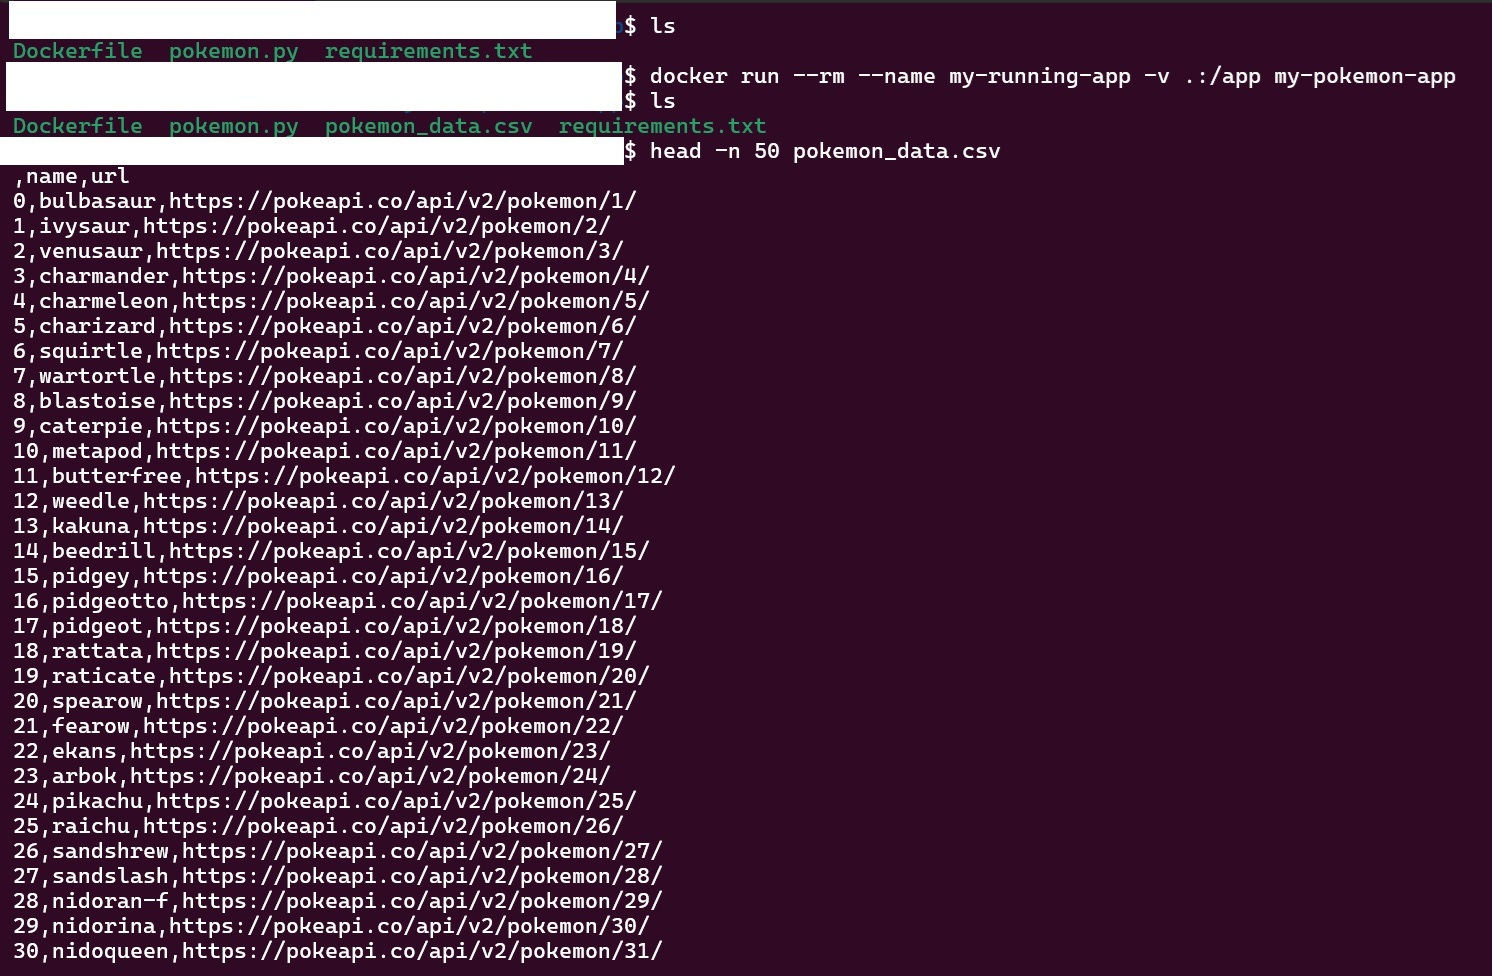
Here we can see that a new csv file is created with the pokemons and their respective urls. The best part of this is that I can share this image by uploading to Docker Hub.
To upload the image to Docker, run the below command:
docker tag my-pokemon-app ksakra/my-pokemon-app
docker push ksakra/my-pokemon-app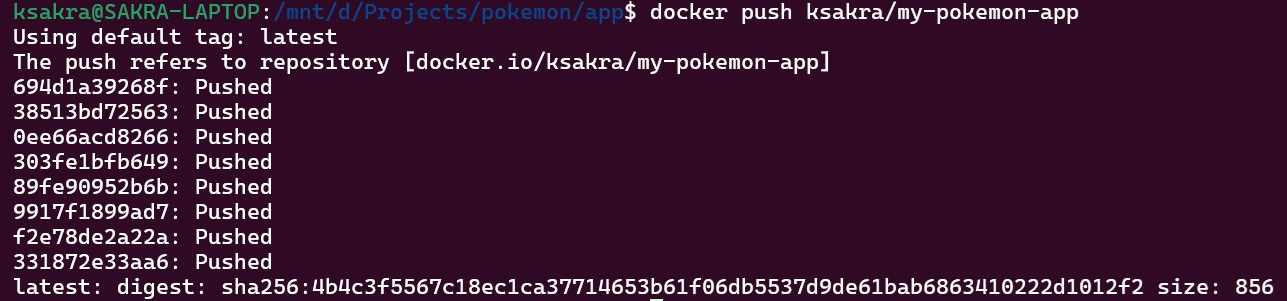
I have uploaded the image to Docker hub. If I want to download it, I just have to search for ‘my-pokemon-app’ in the hub and we get the below result.
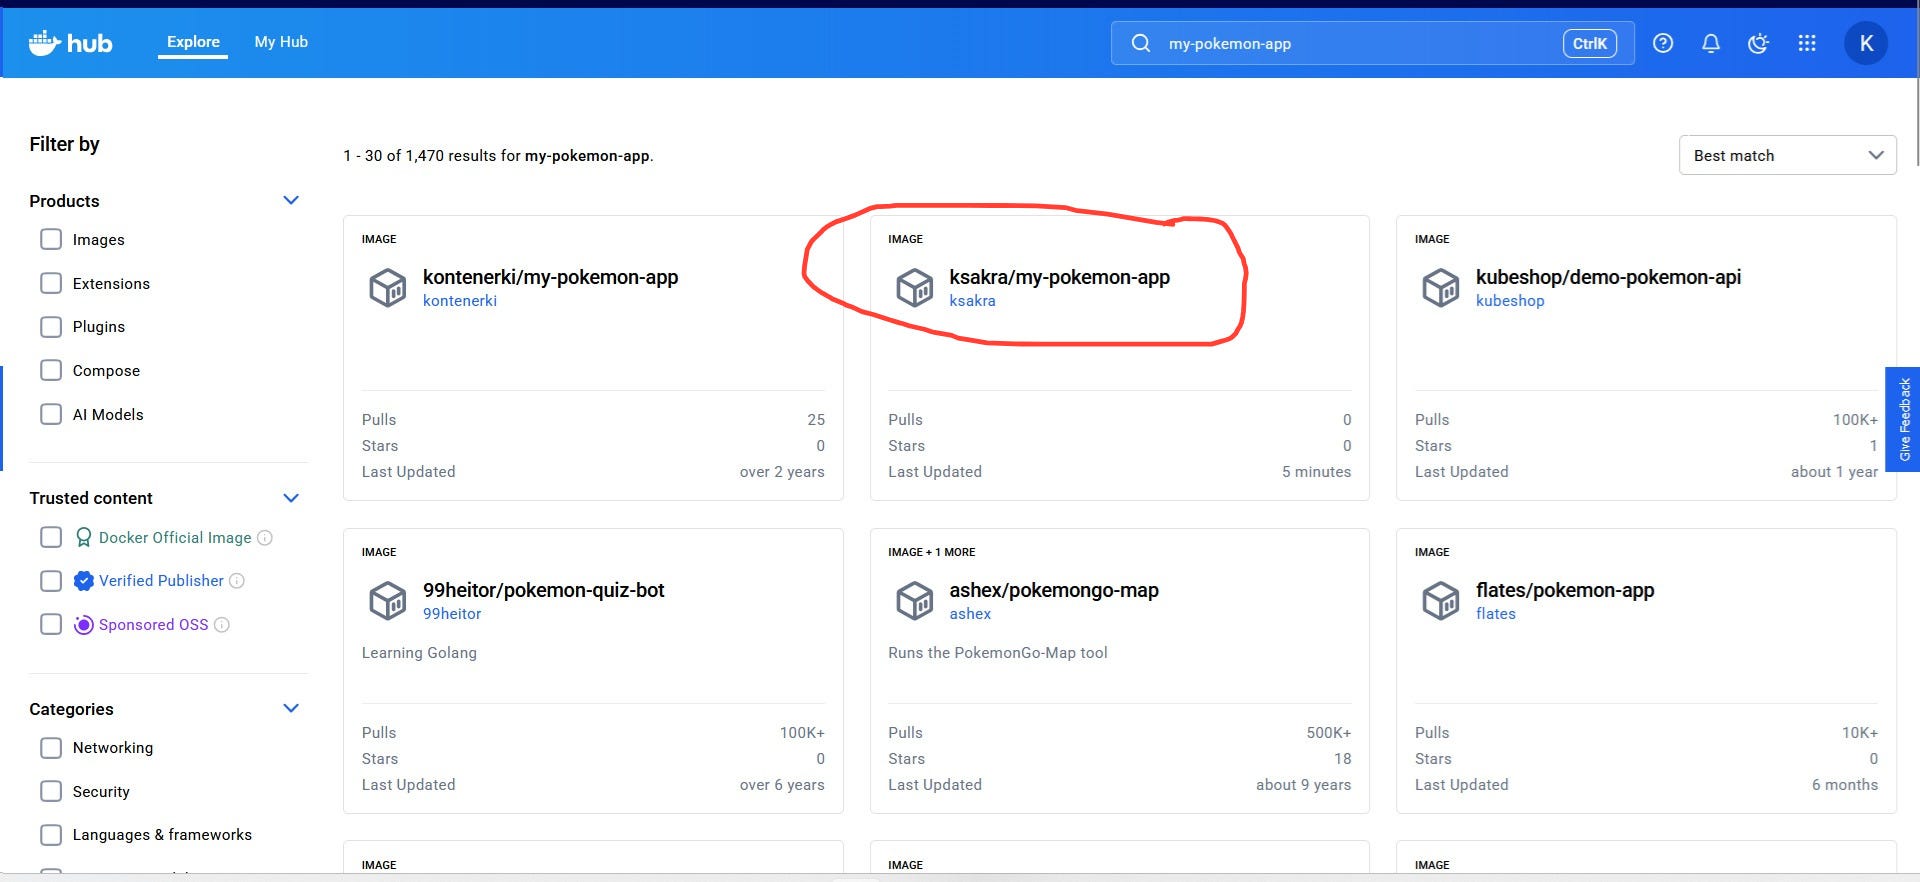
I am not the only one who have uploaded images based on the pokemon API, based on the above image. You can try downloading my image or any of the images above and experiment it on your system.
From Single Containers to Multi-Service Applications
We’ve mastered building custom Docker images with Dockerfiles, but every data engineer eventually hits the same wall: real applications don’t run in isolation.
Your Pokemon data pipeline might need:
Your Python application scraping API data
A PostgreSQL database storing historical records
A Redis cache for frequently accessed data
An Airflow scheduler orchestrating the entire workflow
Sure, you could run multiple docker run commands with a tangle of --link, --network, and -v flags, manually ensuring containers start in the right order and can talk to each other—but that defeats Docker’s core promise of simplicity and reproducibility.
Enter Docker Compose - your blueprint for orchestrating multi-container applications.
Docker Compose lets you define your entire application stack in a single YAML file: which services to run, how they connect, what volumes they need, and their startup dependencies. Think of it as turning your scattered docker run commands into version-controlled infrastructure.
In the next post, we’ll learn to write Docker Compose files and transform from single-container builders to full-stack orchestrators.
Coming next: “Docker Compose Essentials: Orchestrating Multi-Container Data Pipelines”
Thank you for reading! If you found this interesting, do consider following me and subscribing to my latest articles. Catch me on LinkedIn.